Introduction
I design and build interactive systems and experiences, through software and hardware integration.
This portfolio documents my projects across hardware systems, embedded software, and tool development. Each project builds on the last, following my progression from small and experimental ideas to increasingly complex systems focused on integration, iteration, and user experience.
My Personal Favorites are:
Electromechanical Pinball Machine
Off-Axis Projection in Unity
Foot Motion Capture Device
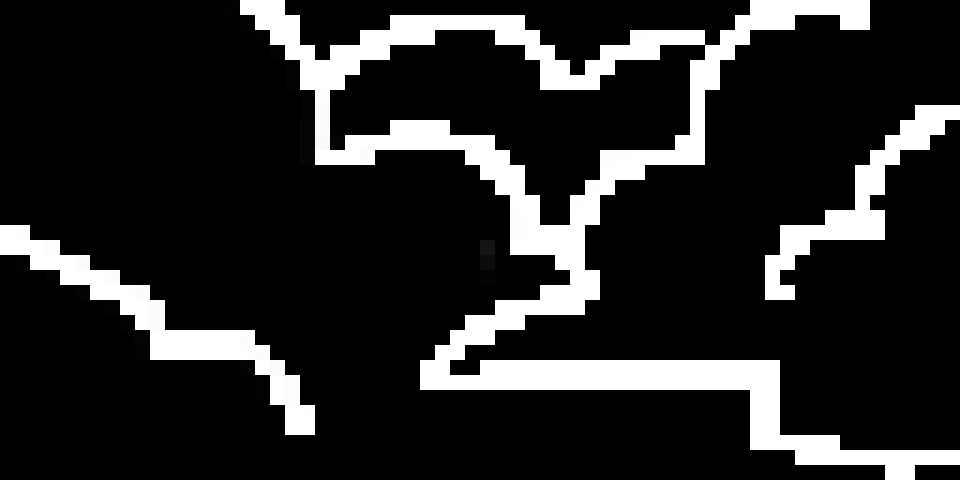
(One of the 64x32 pixel art animations shown on the RGB Matrix Display of the Pinball Machine)
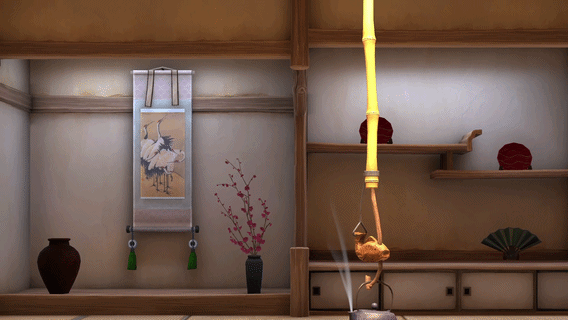
Pinball Machine
"The Ultimate Battle" (Pinball Machine) - 2024/2025

Backbox

Full cabinet (without playfield glass).

Disassembled Playfield, with artwork installed.
Backbox
One of the most intensive projects I have ever undertaken, this electromechanical pinball machine was handcrafted as my Master's Project with the goal of creating a fully realized interactive experience. I designed the gameplay, cut and assembled the cabinet, wired the electronics, created and assembled several custom PCBs, and wrote the underlying code for the machine. The artwork for the backbox, sides, and playfield was created by Rhea Vurghese, with assistance from Alexa Schuster. Additionally, Paul Nieves helped record the voices of Felicia Lai and Deon Rivers for the project.
Multiple interconnected software systems were developed to control the hardware and orchestrate the gameplay. These include a coin door controller, a “master controller” (which relays data to and from the playfield), an RGB LED driver, and a central program running on a Raspberry Pi. This central program is written in C (compiled with C++) and uses the SDL3 and LED Matrix libraries to drive the dot matrix display, handle audio mixing, and control game states. It communicates through USB with the coin door, RGB LED driver, and master controller, all of which are programmed using Arduino. Together, these components provide the full functionality of the pinball machine. Below you can find a detailed manual showcasing additional drawings, schematics, images, and documentation:
Digital Window
Python/C#: Digital Window in Unity - 2026
Inspired by autostereoscopic monitors showcased at SIGGRAPH, this project was designed as an experiment in head tracking, off-axis projection math, and 3D programming. By tracking the viewer's head position with a standard consumer webcam and dynamically adjusting the camera projection matrix, a rough parallax effect is created on-screen. The GitHub page with an up-to-date working version is linked above.
How it works:
-
A webcam captures the user's face.
-
MediaPipe detects facial landmarks and estimates head position.
-
The head position is streamed to Unity using UDP (on port 5005).
-
Unity modifies the camera projection matrix using off-axis projection.
-
The rendered scene updates perspective based on the viewer's head movement.
Foot Mocap Device
Python/UE5: Foot Motion Capture Device - 2026


I wanted to build a hardware and software prototype, so I decided to create an IMU-based motion capture device with three force-sensitive resistors embedded in an insole to track force exerted at the foot tripod. To hold the MCU and COTS IMU components, a small 3D-printed clip attaches to the back of any shoe, and the insole is inserted. The data is then transmitted via USB-C to a Python script, which performs sensor fusion using a Madgwick filter implementation. The processed data is then sent to Unreal Engine 5 using the OSC protocol and Unreal Engine’s built-in OSC implementation. Above is a YouTube playlist with examples of the prototype in action.
How it works:
-
The MCU reads data from an IMU and three FSRs.
-
A Python script reads this data through USB.
-
The Python script runs an AHRS Madgwick filter and converts IMU data into pitch, yaw, and roll.
-
The Python script sends the processed data to Unreal Engine using the OSC protocol.
-
Unreal Engine interprets the data and performs minor bone manipulations on the standard UE5 Mannequin.
Coding Projects
Python: Procedural History Generation Project (PHGP) - 2021

This was my first personal project in Python. I’ve always been fascinated by computer simulations like Dwarf Fortress and their ability to create worlds and narratives through procedural generation. With this project, I aimed to achieve two main goals: the generation of unique characters and their interactions within a world space, with the hope of allowing emergent "stories" to be captured. One of the most challenging aspects was terrain generation, since I experimented with several different terrain generation algorithms before settling on the one shown above. In this simulation, characters interact, form families, and migrate across the map, with time advancing approximately one day per second. If the simulation runs long enough with a sufficient starting population, small towns begin to emerge!
Python: Ryan's Insane Baseball Simulator (RIBS) - 2022

This was my second big project in Python. As a longtime baseball fan, I wanted to build a simulator that could pit two fictional, randomly generated teams against each other in a scrimmage game. The simulator includes extensive ball and bat physics, projectile trajectories, and fielder coverage zones. It also builds on the character generation work from my previous project, with players having unique names, personalities, and custom stats. While not graphically impressive, the simulator runs a scorebug with the baseball diamond drawn out in ASCII, where bases are filled in with an "X" to indicate which base a player is on.
Python: BABEL V2 - 2023

This Python program was originally intended to rework functionality from the PHGP codebase. It features a lightweight user interface that generates fictional, alphabetic "languages" using the International Phonetic Alphabet (IPA). The program reads a CSV file containing phonetic transcriptions of English words and converts it into a Python dictionary. It then extracts a set of unique English phonemes and maps each one to a randomly generated replacement phoneme. The result is a simple find-and-replace tool that transforms input sentences into their phonetic equivalents in a new fictional "language".
Python: Kiosk UI for Dining Hall Automation - 2024

Kiosk UI from the Student's perspective, after placing their order.

Kiosk UI from the worker's perspective, where the machine and UI is loaded with the menu and items.
Kiosk UI from the Student's perspective, after placing their order.
This project comprised the software component of my Senior Capstone, in which my team was tasked with designing an automated serving machine for the Rensselaer dining hall, sponsored by Sodexo. My role focused on developing both the front end and back end of the ordering kiosk. Built using PyQt, the system included two user interfaces: one for dining staff to remotely upload the menu, and another touchscreen-friendly interface for customers to place orders. The customer UI was designed to be compatible with either custom hardware (see PCB Design section) or any touchscreen device. Once an order is placed, it is logged in a timestamped .csv file for stocking analytics and then sent to the serving machine for processing.
PCB Design Projects
Pinball Machine Motherboard Prototype (NUC980) - 2023

Prototype motherboard for the Pinball Machine (based on the NUC980). PCB Layout View.

Prototype motherboard for the Pinball Machine (based on the NUC980). 3D Layout View.
Prototype motherboard for the Pinball Machine (based on the NUC980). PCB Layout View.
This is the first iteration of the motherboard for the Pinball Machine, created as a prototype before full development began. The design is based on the NuMaker NUC980 SoC but was not pursued further due to my decision to use an authentic dot matrix display as well as to incorporate an additional LCD screen on the playfield (which this SoC did not support). I later switched to using a Raspberry Pi, which better aligned with my development goals, met my criteria, and reduced the estimated cost. Above is the layout and the 3D view of the board, as seen in Altium Designer.
Kiosk Motherboard (Raspberry Pi Compute Module) - 2024

Kiosk board based around the Raspberry Pi Compute Module. Designed for Senior Capstone Project sponsored by Sodexo. PCB Layout View.

Kiosk board based around the Raspberry Pi Compute Module. Designed for Senior Capstone Project sponsored by Sodexo. PCB 3D View.

Schematic for the kiosk board based around the Raspberry Pi Compute Module. Designed for Senior Capstone Project sponsored by Sodexo.
Kiosk board based around the Raspberry Pi Compute Module. Designed for Senior Capstone Project sponsored by Sodexo. PCB Layout View.
This PCB was developed for my Senior Capstone Design Project, sponsored by Sodexo, to automate the serving process at an Rensselaer dining hall. The board is built around the Raspberry Pi Compute Module with Wi-Fi support and is designed to fit into the base of the kiosk. It includes provisions for SD card storage, a 5V DC power jack, a USB port, and a ribbon cable for a touchscreen display. This was designed as an alternative for driving the touchscreen device in case a dedicated computer was not desired. Above is the layout and the 3D view of the board, as seen in Altium Designer.
Pinball Machine MCU "Base Board" (ATMEGA328p) - 2024

Microcontroller "Base Board" PCB Layout based around the ATMEGA328p MCU. This is used extensively as a modular board for the various other Pinball Machine boards.

Microcontroller "Base Board" PCB 3D view based around the ATMEGA328p MCU. This is used extensively as a modular board for the various other Pinball Machine boards.
Microcontroller "Base Board" PCB Layout based around the ATMEGA328p MCU. This is used extensively as a modular board for the various other Pinball Machine boards.
This board was initially created as a test to verify the functionality of the USB-to-UART interface and ensure that the ATmega328P could be programmed correctly. It features a vertical Molex connector to serve as a bridge for the coin door wiring assembly by breaking out the GPIO pins on the MCU. Once the base board’s functionality was debugged and verified, it was repurposed as the USB interface and main MCU for subsequent boards, facilitating fast development and testing of the pinball machine. Above is the layout and the 3D view of the board, as seen in Altium Designer.
Pinball Machine RGB LED Driver - 2024

PCB Layout view of the LED driver board used to program the outputs of 32 RGB LEDs used for the Pinball Machine.

PCB 3D view of the LED driver board used to program the outputs of 32 RGB LEDs used for the Pinball Machine.
PCB Layout view of the LED driver board used to program the outputs of 32 RGB LEDs used for the Pinball Machine.
This is the first revision of the RGB LED Driver, which interfaces with the Base Board. It uses 12 8-bit shift registers daisy-chained to control each individual RGB LED Board (and its individual RGB elements) using bytes received via USB. In addition to controlling up to 32 LEDs and their individual RGB elements, the device features global brightness control via a PWM signal fed into a PMOS transistor. Above is the layout and the 3D view of the board, as seen in Altium Designer.
Pinball Machine RGB LED Board- 2024

PCB layout view of the RGB LED used for the Pinball Machine Playfield.

PCB 3D view of the RGB LED used for the Pinball Machine Playfield.
PCB layout view of the RGB LED used for the Pinball Machine Playfield.
This board contains the RGB LED, which connects to the RGB LED Driver via a 5-pin Molex connector and wiring harness. The harness carries the 5V PWM signal, GND, and data lines for Red, Green, and Blue. The LED is common anode and features three resistors in series with the cathodes, which are controlled by NMOS transistors. The gates of these transistors are connected to the respective Red, Green, and Blue data lines from the RGB LED Driver. Above is the layout and the 3D view of the board, as seen in Altium Designer.
Pinball Machine Master Controller - 2025

PCB layout view of the Master Controller, which reads all the various switches on the Pinball Machine playfield and causes solenoid activation.

PCB 3D view of the Master Controller, which reads all the various switches on the Pinball Machine playfield and causes solenoid activation.
PCB layout view of the Master Controller, which reads all the various switches on the Pinball Machine playfield and causes solenoid activation.
This board serves as the nervous system of the pinball machine. It manages switch activations, solenoid responses, scoring, and game state tracking. Its core functionality relies on I2C communication, with the Base Board's MCU acting as the host interface and three identical ATmega328P MCUs serving as GPIO expanders, each responsible for a subsection of the playfield. While this approach is not the most efficient for handling a large number of GPIOs, it simplified schematic entry and layout since the building blocks were already validated on the Base Board. Above is the layout and the 3D view of the board, as seen in Altium Designer.
Pinball Machine MCU I2C GPIO Extender - 2025

PCB layout view of the GPIO extender board, used with the Master Controller to enable more inputs and outputs if necessary.

PCB 3D view of the GPIO extender board, used with the Master Controller to enable more inputs and outputs if necessary.
PCB layout view of the GPIO extender board, used with the Master Controller to enable more inputs and outputs if necessary.
This additional board can be connected to the Master Controller to provide extra GPIO pins in the event that more playfield functionality is desired beyond the original scope of the project. It follows the same layout as the other ATmega328P boards and breaks out GPIO pins as through-hole solder pads and I2C pins for communication back to the Master Controller. Above is the layout and the 3D view of the board, as seen in Altium Designer.
Pinball Machine Photodiode Detector - 2025

PCB layout view of the Photodiode Detector board.

PCB 3D view of the Photodiode Detector board.

Physical board, FR4 with plated with a single layer of copper.
PCB layout view of the Photodiode Detector board.
This additional board was created for the pinball machine to enable the MCUs on the Master Controller board to detect whether a photodiode is receiving light from a transmitter. It is used in various parts of the machine to detect the presence of a pinball. The board serves as both a power hub for the photodiodes and transmitters and an interface that allows the microcontroller to read light detection via a digital GPIO pin. The design is intentionally simple (single-layer), as it also served as a practice project for using the desktop PCB CNC machine in the X-LAB at Rensselaer Polytechnic Institute. Above is the layout and the 3D view of the board, as seen in Altium Designer, along with a picture of the fabricated PCB.